
How Should You Clean and Inspect a Pressure Cooker Valve and Gasket?
Clean pressure-cooker valves, steam passages, and the gasket only when fully cool and depressurized. Learn how to inspect blockage, valve movement, gasket damage, and correct seating.
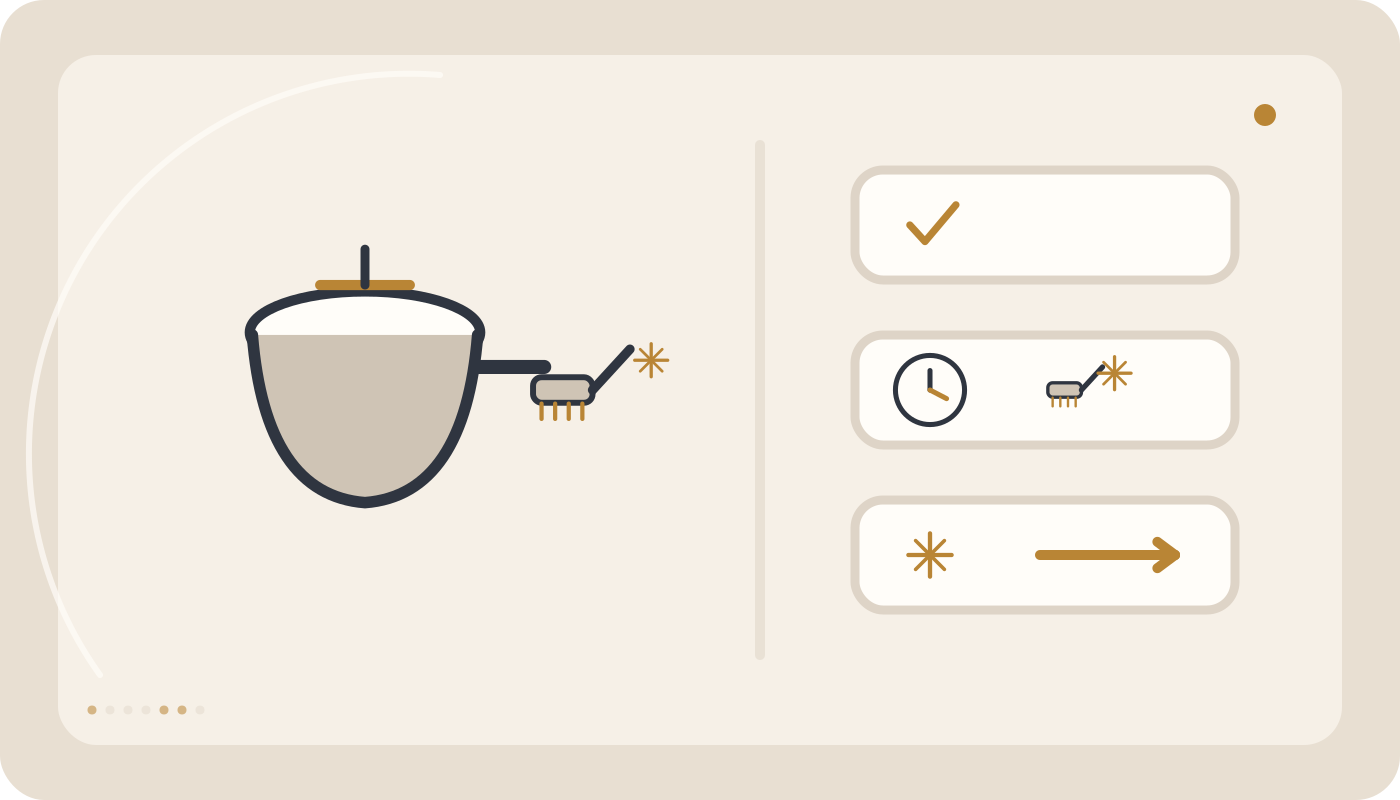
Only remove user-serviceable parts after the cooker is fully cool and depressurized. Clean the operating valve with running water and mild detergent as allowed by the manual, inspect the steam passage for obstruction, and confirm that movable components operate freely. Wash the gasket and its channel gently and reinstall without twisting. A cracked, hardened, deformed gasket or a valve that remains stuck should be corrected before the next pressure-cooking cycle.
Before you start
How Should You Clean and Inspect a Pressure Cooker Valve and Gasket?
Two pressure-cooker areas require regular attention: the steam-control path and the lid-sealing gasket. Food residue, grease, or scale can obstruct valve movement or steam flow, while a dirty, hardened, cracked, deformed, or incorrectly seated gasket can contribute to steam leakage and failure to build pressure.
Quick answer: Only remove user-serviceable parts when the cooker is completely cool and fully depressurized. Clean the operating valve with running water and mild detergent as permitted by the model instructions, inspect the steam path for obstruction, and confirm that movable components operate freely. Wash the gasket and its channel with a soft sponge and mild detergent, rinse thoroughly, and reinstall it without twisting. Do not use the cooker if the gasket is cracked, torn, severely hardened, or deformed, or if a valve that should move freely remains stuck.
Valve and gasket maintenance checklist
| Part | Check | Warning sign |
|---|---|---|
| Operating valve | Clean and freely movable | Sticking, blockage, or incorrect installation |
| Steam outlet | Clear of food debris | Obstruction or restricted flow |
| Safety valve | Clean and movable as designed | Sticking or damage |
| Gasket | Flexible, intact, and correct size | Cracking, tearing, hardening, or deformation |
| Gasket channel | Clean and free of grease | Residue buildup |
| Pot rim | Clean and undamaged | Dried food or distortion |
1. Confirm complete depressurization before any maintenance
Do not remove lid components, valves, or gaskets while the cooker is hot or pressurized.
2. Keep the exact model manual nearby
Valve construction, removal steps, gasket orientation, and dishwasher permissions vary between models.
3. Photograph the original arrangement if useful
A reference photo can help during reassembly, but the product manual remains the final authority.
4. Remove only parts designated as user-removable
Do not disassemble sealed safety systems, internal springs, or screws that are not part of routine maintenance.
5. Remove the operating valve as instructed
Many models have a removable regulator, but the exact method is model-specific.
6. Wash the operating valve under running water
Use lukewarm water and mild dish detergent unless the manufacturer specifies another method.
7. Confirm free movement where the design requires it
A movable valve should not remain sticky or stiff after cleaning.
8. Do not force a stuck valve
Excessive force can damage the component. If it remains stuck after proper cleaning, stop using the cooker.
9. Inspect the steam-release path
The passage should be free of food particles, grease, and scale.
10. Light can help reveal a visible blockage
Where the design permits direct visual inspection, checking the opening against light can be useful.
11. Do not use unsuitable tools to clear the vent
Hard wire, drills, or oversized needles can alter or damage the passage.
12. Clean the designed opening; do not enlarge it
Steam-path dimensions are part of the pressure-control design.
13. Inspect the safety valve as permitted
If the manufacturer provides a user check for the safety valve, verify cleanliness and free movement exactly as instructed.
14. Never modify a safety system
Do not shorten springs, add weight, plug openings, or substitute unknown safety parts.
15. Food inside the valve system requires complete cleaning
Rice, legumes, and foaming foods can carry debris into steam passages.
16. Repeated blockage should trigger a fill-level review
Overfilling or ignoring lower fill limits for expanding foods can contribute to repeated contamination.
17. Inspect the gasket after the valve system
Remove it only when cool and according to the model instructions.
18. Wash the gasket with a soft sponge
Mild detergent and lukewarm water are appropriate baseline methods unless the manual says otherwise.
19. Clean both gasket contact surfaces
The areas contacting the lid and pot rim should be free of grease and food residue.
20. Clean the gasket channel separately
A clean gasket cannot seal correctly if residue remains in its housing.
21. Clean the pot rim
Rice grains and dried food can interrupt uniform sealing.
22. Inspect for cracks and cuts
Look at the gasket under good lighting and replace it when damaged.
23. Flexibility matters
A severely hardened or dry gasket may no longer conform correctly to the sealing surfaces.
24. Check for deformation
A stretched, twisted, shrunken, or misshapen ring may not seat correctly.
25. Do not stretch the gasket to make it fit
Intentional stretching can change its sealing geometry.
26. Never shorten the gasket
Its dimensions are part of the cooker design.
27. Do not substitute a merely similar gasket
Visual similarity or close diameter is not enough; use a confirmed compatible part.
28. Check gasket orientation
Some seals have a designated side or direction.
29. Use fingers rather than sharp tools where hand installation is specified
This reduces the risk of cuts or punctures.
30. Confirm even seating around the full circumference
No section should be twisted or pushed out of its channel.
31. Do not apply unknown compounds
Do not add glue, industrial grease, or household substances unless explicitly approved by the manufacturer.
32. Dishwasher compatibility varies
The pot, lid, gasket, regulator, and removable modules may have different dishwasher restrictions depending on the model.
33. Avoid general use of bleach and chlorine products
Strong chemicals may be unsuitable for metals, seals, and other components unless specifically approved.
34. Rinse all parts thoroughly
Do not leave detergent residue in steam passages or on sealing surfaces.
35. Inspect components before reassembly
Cleaning alone is not enough; look for cracks, deformation, breakage, or abnormal movement.
36. Reassemble the valve system in the exact specified order
Incorrect orientation or component order can alter pressure regulation.
37. Tighten or lock parts only as instructed
Avoid excessive force when the manual does not call for it.
38. Perform a final visual and movement check
Where the design allows, verify clear steam passages and normal component movement after reassembly.
39. Do not pressurize if a valve remains stuck
Residual blockage, incorrect assembly, or component damage may still be present.
40. If the gasket will not stay seated
Check part compatibility, orientation, and channel condition instead of compensating by stretching or forcing it.
41. If steam leaks around the lid after cleaning
Recheck gasket seating, the channel, pot rim, and lid lock. Detailed lid-leak troubleshooting is covered separately.
42. If the cooker no longer builds pressure after cleaning
Check regulator installation, steam passages, pressure indicators, and gasket seating.
43. Follow manufacturer replacement intervals
Replacement timing differs by brand and model. Cracking, tearing, severe hardening, or deformation can justify earlier replacement.
44. Store spare gaskets properly
Keep replacement seals clean, dry, away from heat and chemicals, and free from unnecessary stretching or compression.
45. Label spare parts by model
Keeping the exact model reference with replacement gaskets and valves reduces the chance of installing an incorrect part.
46. Inspect more carefully after foaming foods
If rice, legumes, or starches have reached the upper lid area, inspect the steam path before the next use.
47. A simple after-use routine
- Allow complete depressurization and cooling.
- Remove only user-serviceable components as instructed.
- Clean the operating valve and confirm proper movement.
- Inspect the steam outlet for obstruction.
- Check any user-serviceable safety valve as instructed.
- Wash the gasket and gasket channel with mild detergent.
- Clean the pot rim.
- Inspect the gasket for cracking, hardening, and deformation.
- Rinse and reinstall components correctly.
- Perform a final pre-use check before the next cooking cycle.
48. When should you not start pressure cooking?
| Condition | Action |
|---|---|
| Valve does not move as designed | Do not use until corrected |
| Steam path is blocked | Clear it before cooking |
| Gasket is cracked or torn | Replace with a compatible gasket |
| Gasket will not seat correctly | Check compatibility and orientation |
| Safety component is damaged | Stop use |
| Reassembly order is uncertain | Consult the exact model manual |
Common mistakes
- Removing parts while the cooker is still pressurized
- Cleaning valves without following model instructions
- Enlarging the steam passage with hard tools
- Ignoring the gasket channel
- Using steel wool on the gasket
- Installing the gasket with sharp tools
- Stretching or shortening the gasket
- Using incompatible replacement parts
- Applying glue or unknown compounds to the gasket
- Pressurizing with a stuck valve or uncertain steam path
Conclusion
Valve cleanliness and gasket condition are directly linked to reliable pressure-cooker operation. Clean only the user-serviceable components approved by the manufacturer, keep steam passages unobstructed, confirm normal valve movement, and wash the gasket and its channel gently. Never modify safety passages or pressure components, and do not pressurize the cooker when the gasket is damaged or a valve does not move as designed.
Common mistakes
Change only one variable at a time while diagnosing.
- Do not remove parts while the cooker is pressurized.
- Do not disassemble valves without model instructions.
- Do not enlarge steam passages with hard tools.
- Do not leave the gasket channel dirty.
- Do not use steel wool on the gasket.
- Do not install the gasket with sharp tools.
- Do not stretch or shorten the gasket.
- Do not use incompatible replacement parts.
- Do not apply glue or unknown compounds to the gasket.
- Do not pressure cook with a stuck valve or uncertain steam path.
Frequently asked questions
How often should I clean the pressure-cooker valve?
Inspect steam passages and components after use and follow the exact model's maintenance schedule for detailed cleaning.
How can I tell whether the steam path is blocked?
When the cooker is fully cool and opened, inspect the passage according to the model design for food debris or restricted flow without enlarging it with unsuitable tools.
How should I wash the gasket?
Use lukewarm water, mild detergent, and a soft sponge, clean the gasket channel as well, rinse thoroughly, and reinstall correctly.
When should the gasket be replaced?
Replace it when cracked, torn, hardened, deformed, unable to seat correctly, or when the manufacturer's specified replacement interval is reached.
Can the gasket go in the dishwasher?
Dishwasher compatibility varies by model, so only do this when the exact manual permits it.
What if the valve remains stuck after cleaning?
Do not pressurize the cooker. Recheck assembly, residual obstruction, and component condition according to the manufacturer instructions.
Related guides and products
Still having the problem?
If safe user-level checks do not solve the issue, do not open the appliance. Submit a service request for technical inspection.